 Hay Wagon")
Bride of Frankenstein (1935) Hay Wagon
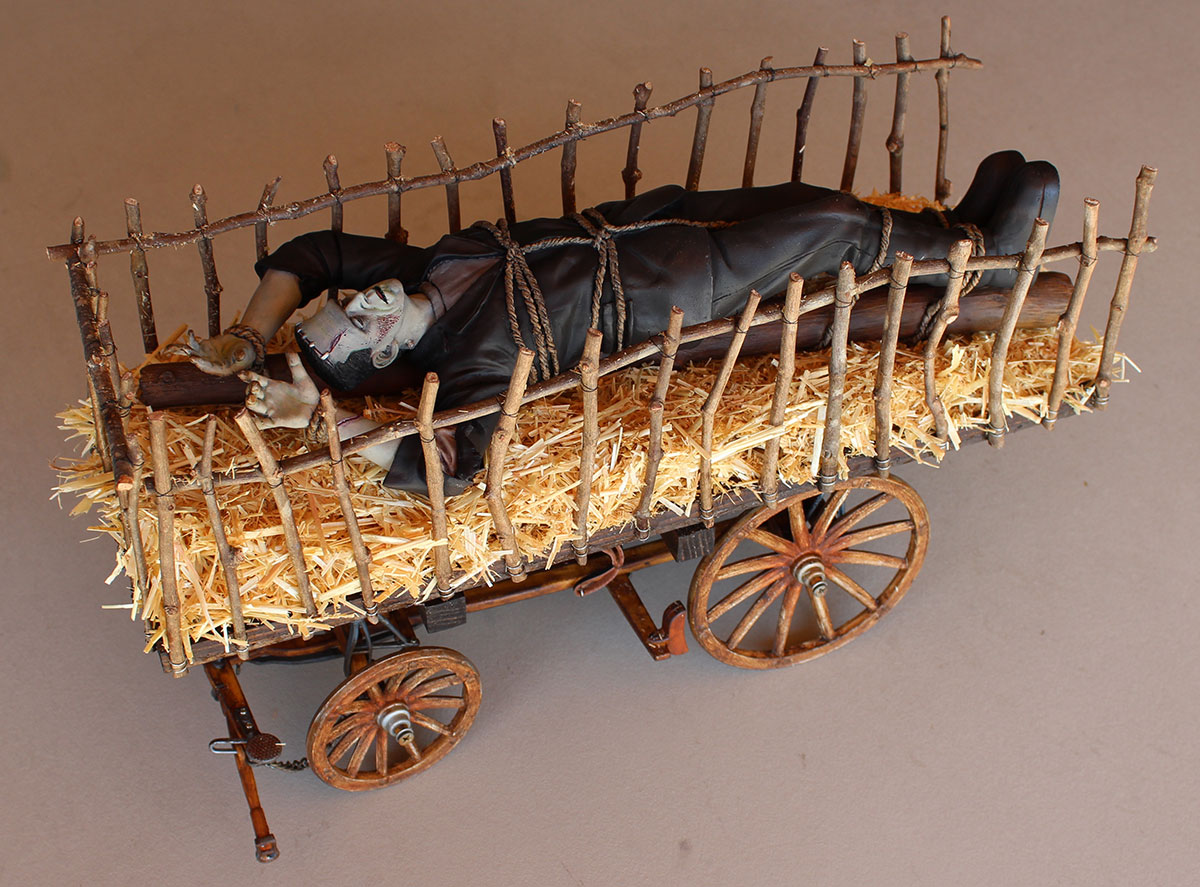
This diorama has been a dream project of mine and it has been a pleasure to check this one off my bucket list. In the film, The Bride of Frankenstein, I love the two scenes of the monster, tied to the log, raised above the angry villagers who threw stones and sticks at him, and then subsequently tossed onto the bed of the hay wagon for his ride to jail. My goal was to have a diorama of the monster on the hay wagon. To complete this diorama I had to solve three problems. The first was the monster himself, then there was the hay wagon, and lastly, more or less finding to scale hay (regular hay is too large and way out of scale).
1) The Monster
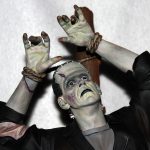
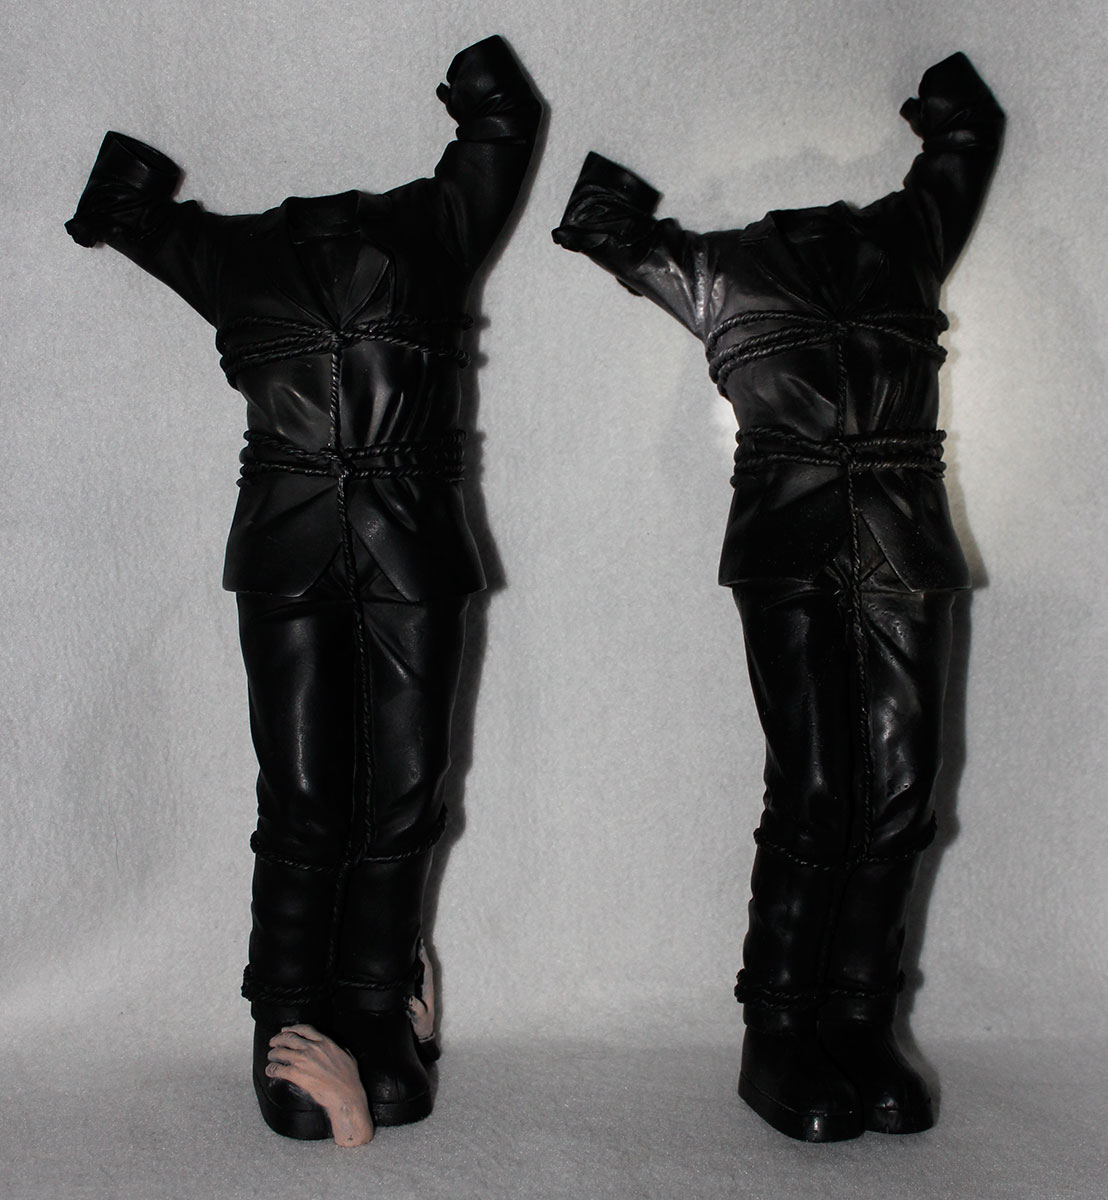
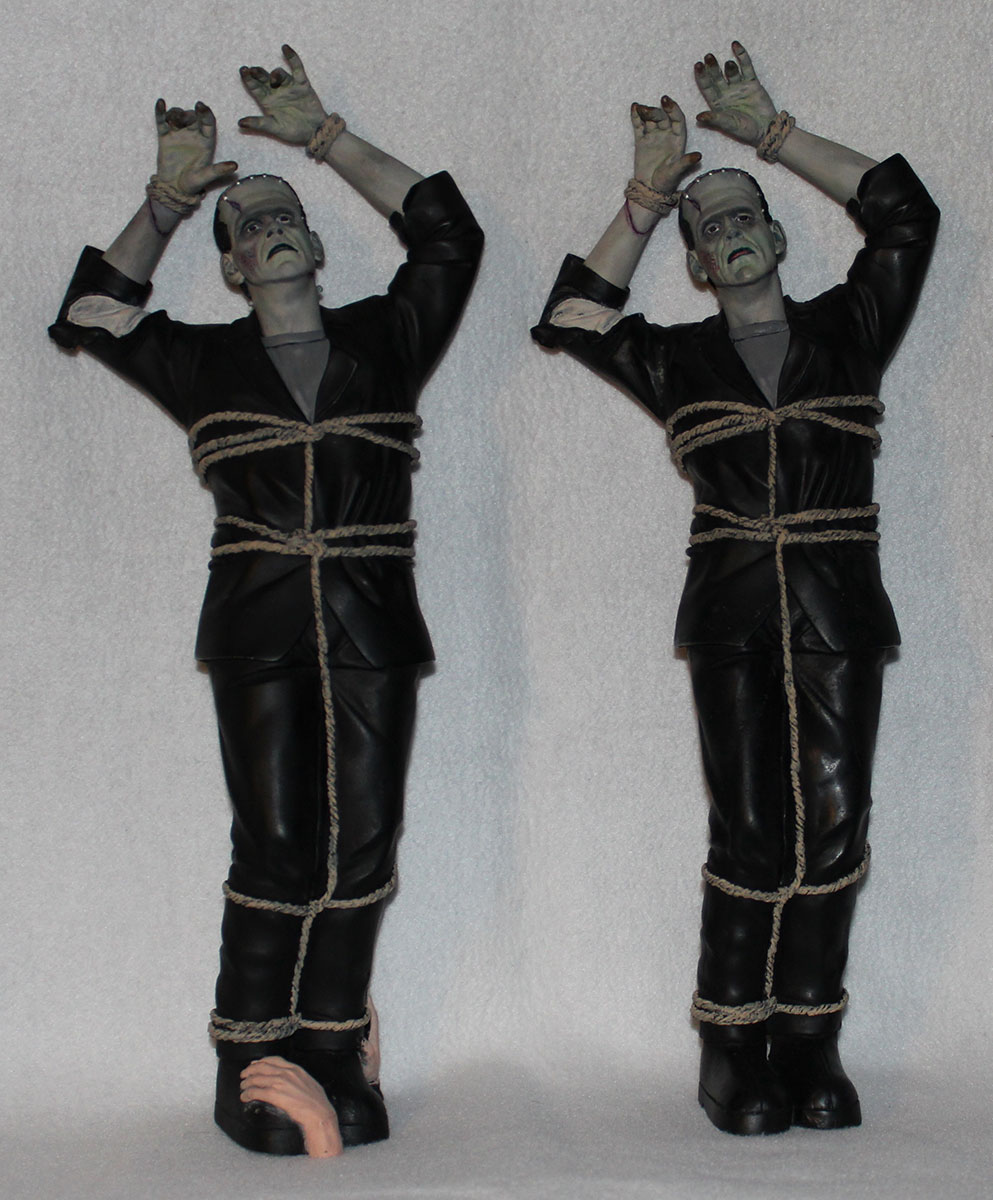
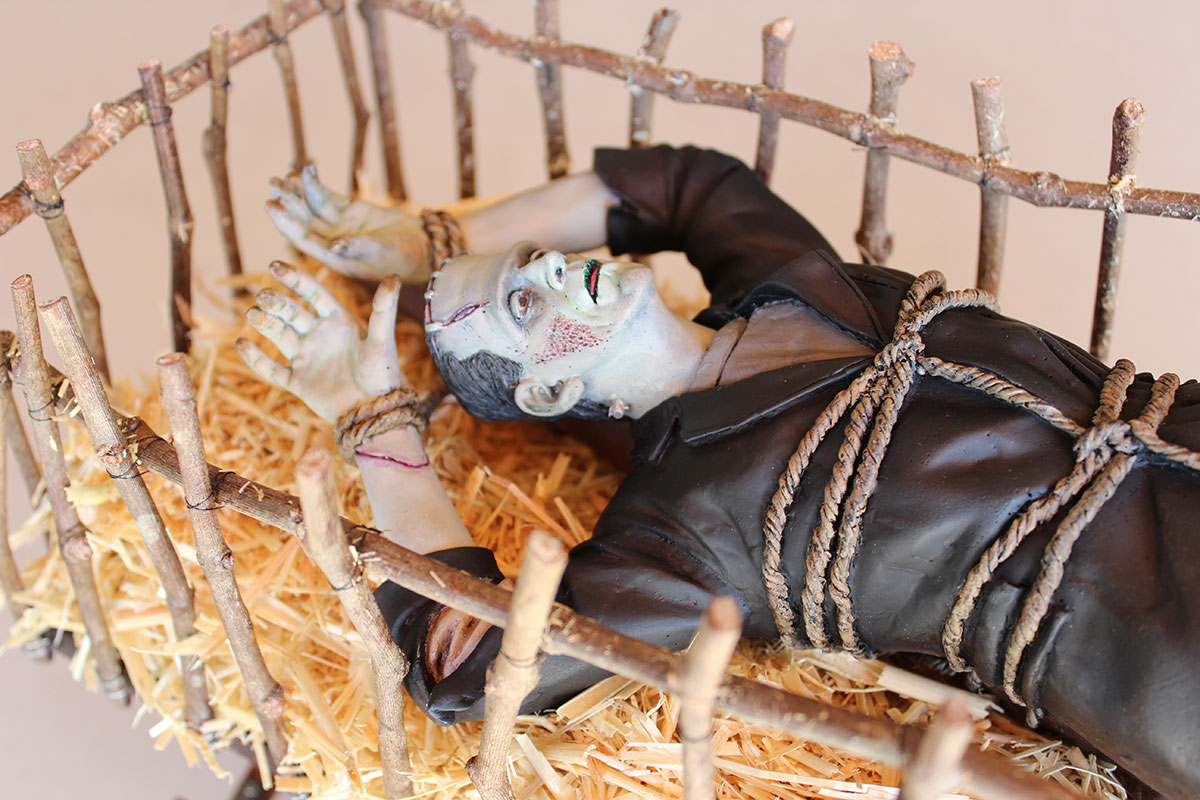
Solving the first problem came via John Tucky at X-O Facto when a few years ago he made available his 1/6th scale “Yeagher Classics” #18 of the Bride of Frankenstein scene where the Karloff monster is tied to a tree trunk and hoisted up by the angry villagers, crucifixion like, who just captured him. This is a beautiful Jeff Yeagher kit all by itself that I love. In the film, the tied up monster was lifted up, stick and stones thrown at him, all in keeping with the Crucifixion, and then unceremoniously tossed onto the bed of a hay wagon to be taken to prison where he was chained to the chair. Though I love the “crucifixion” diorama made available by X-O Facto, as mentioned above, I also equally love the hay wagon scene. At first, I thought I could convert the crucifixion scene into the hay wagon scene but then I would not have the crucifixion scene. My problem was I only had one kit so I could not do both. And I loved the idea of having both dioramas! After some thought I made the decision to have my cake and eat it too and I went to all the trouble of making a copy of the “crucifixion” monster so I would have another to make both dioramas. As a result of such a simple decision I had several months of work ahead of me. For the monster, the following photos show the entire process of creating RTV silicon molds, making resin copies of each component, rendering each piece for each diorama, then assembling and painting the pieces for the final completed figures.
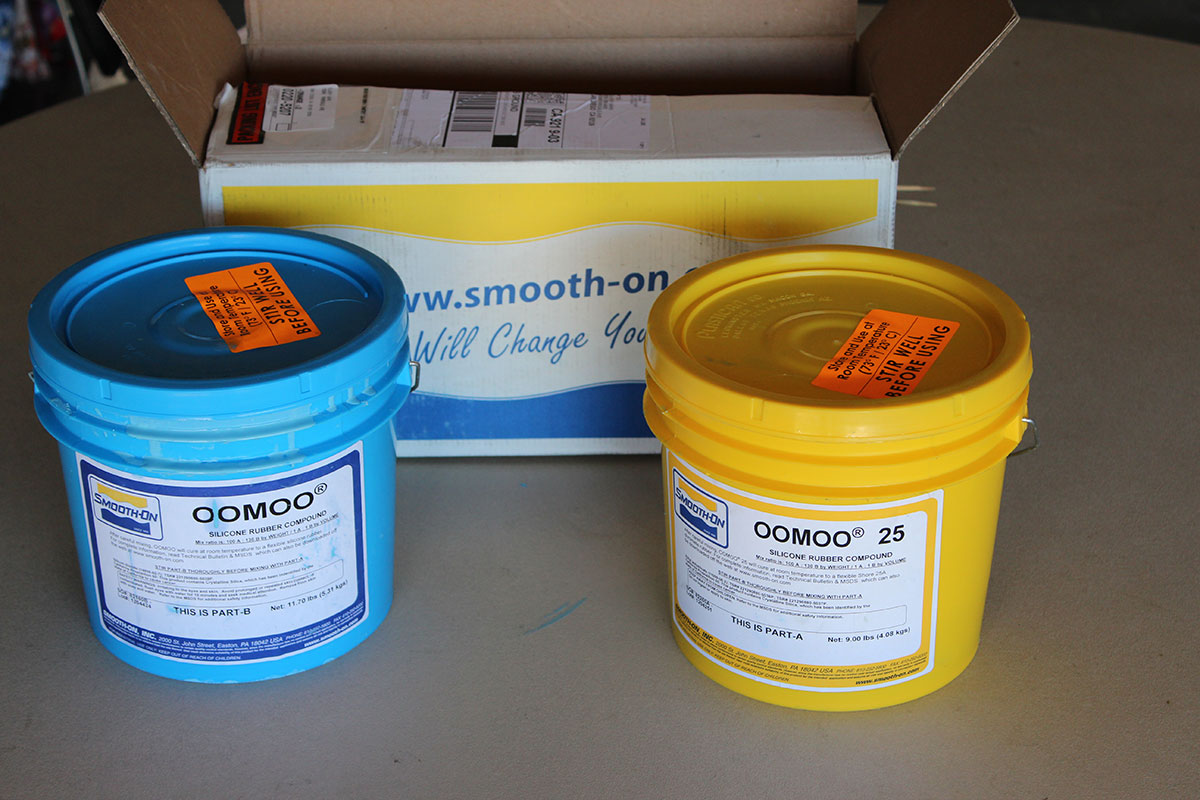
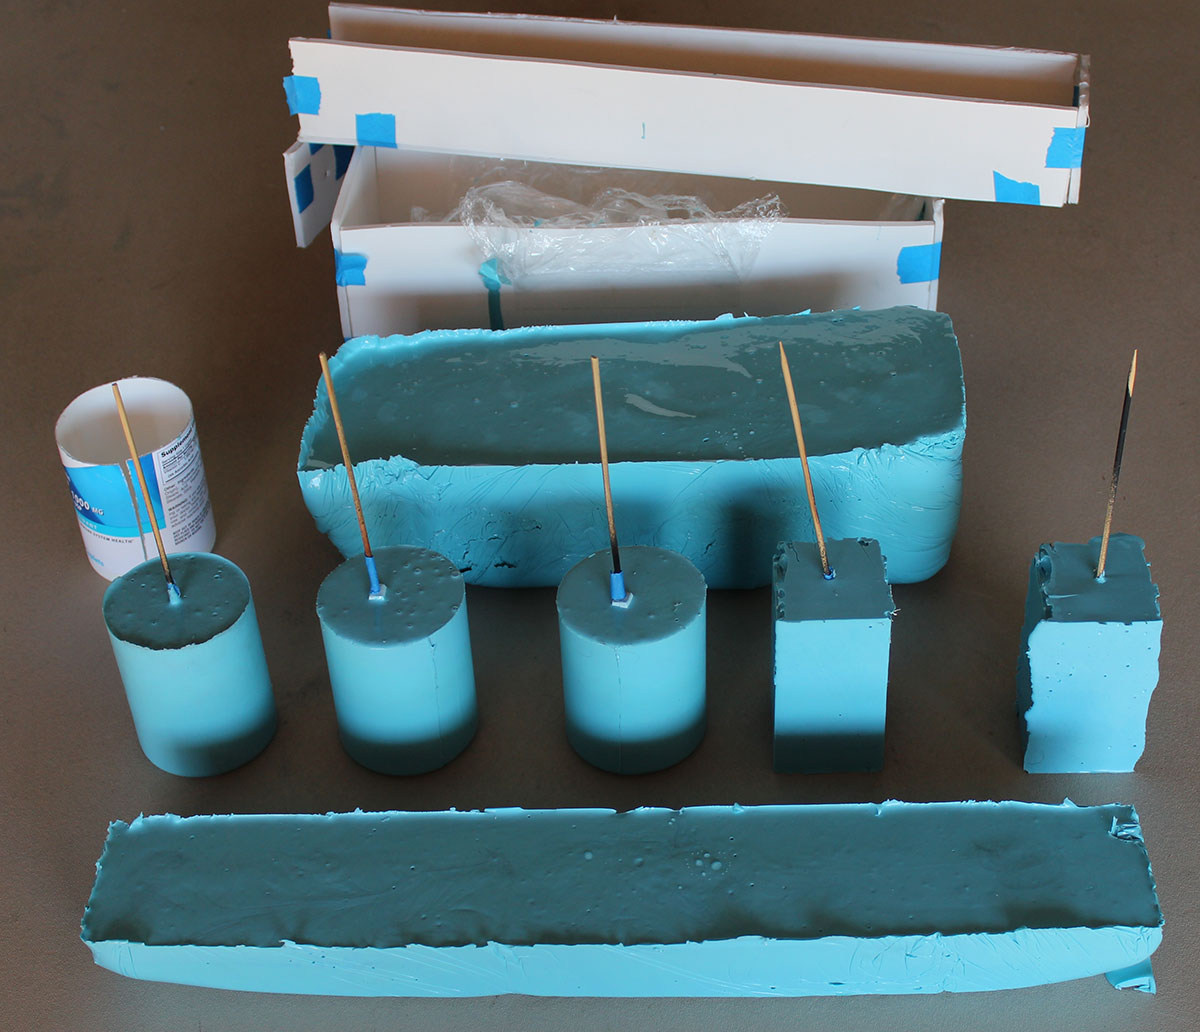
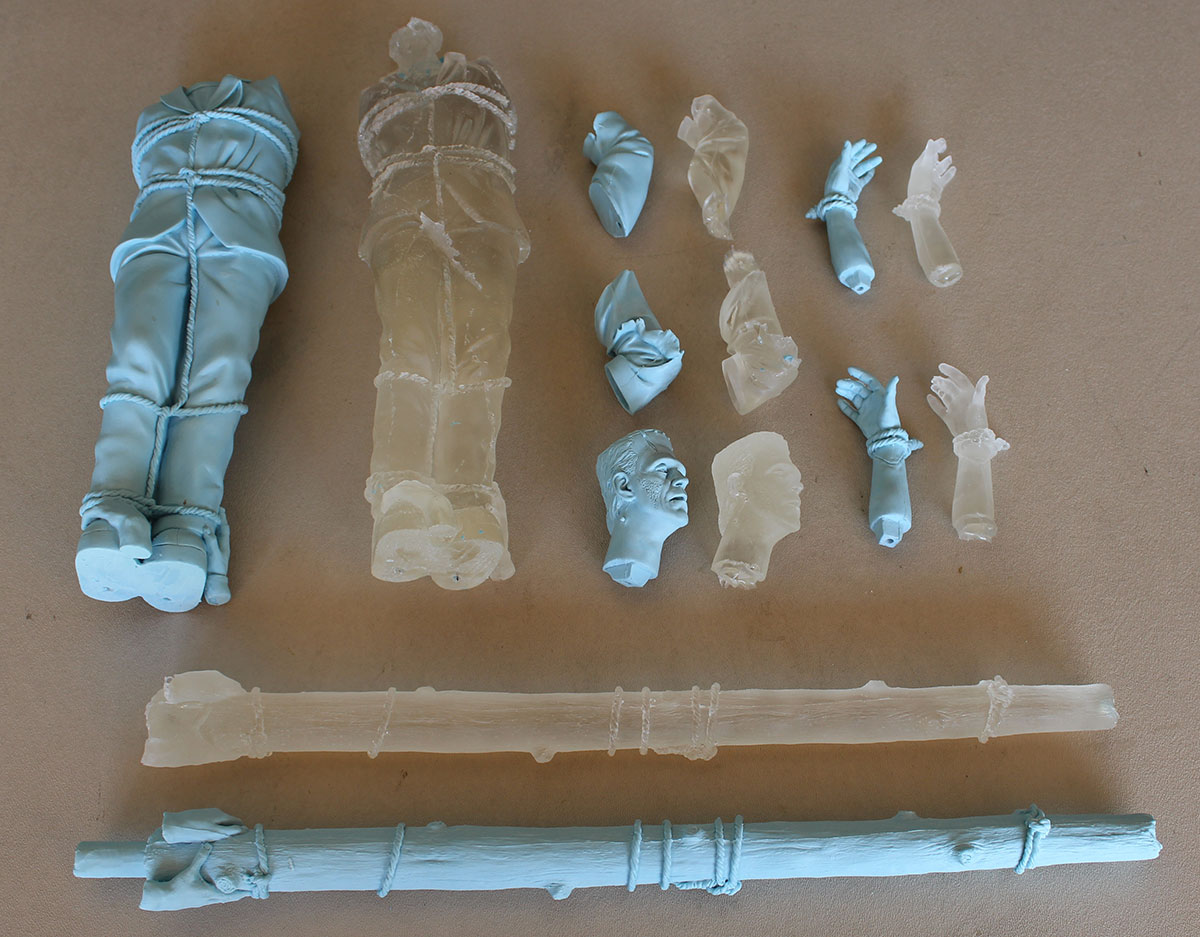
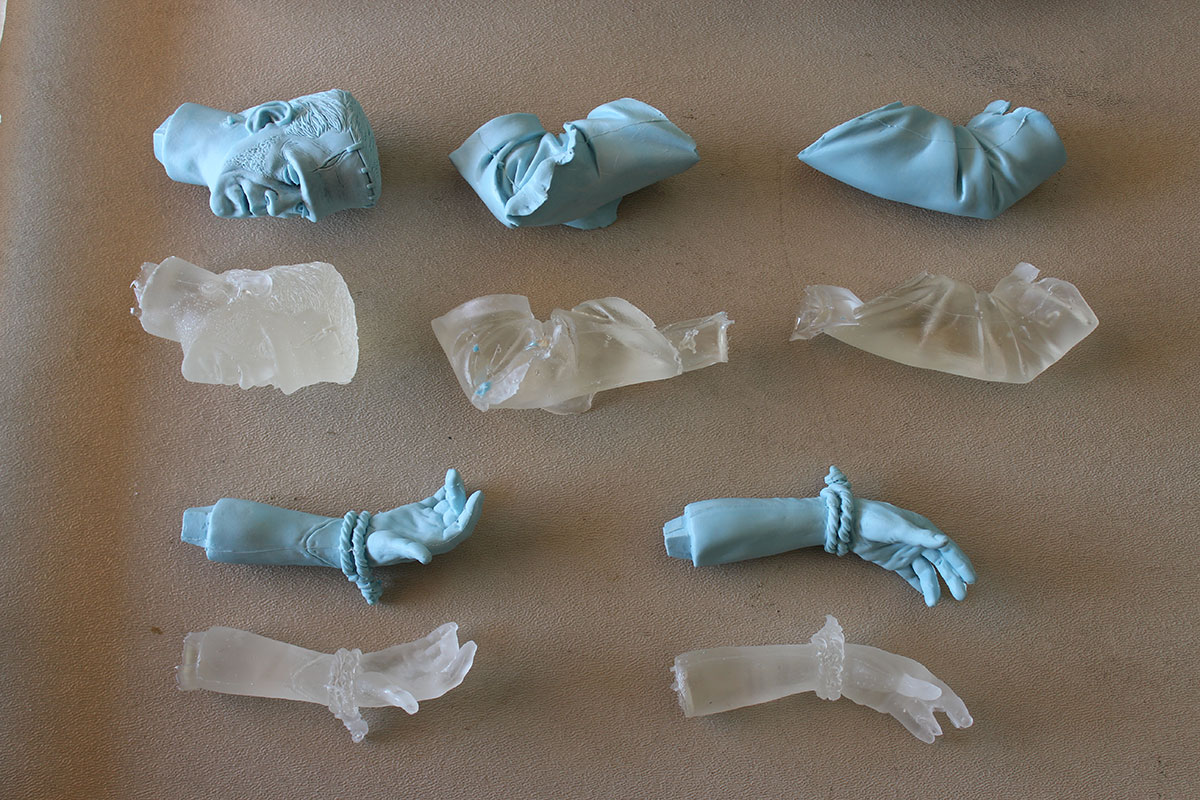
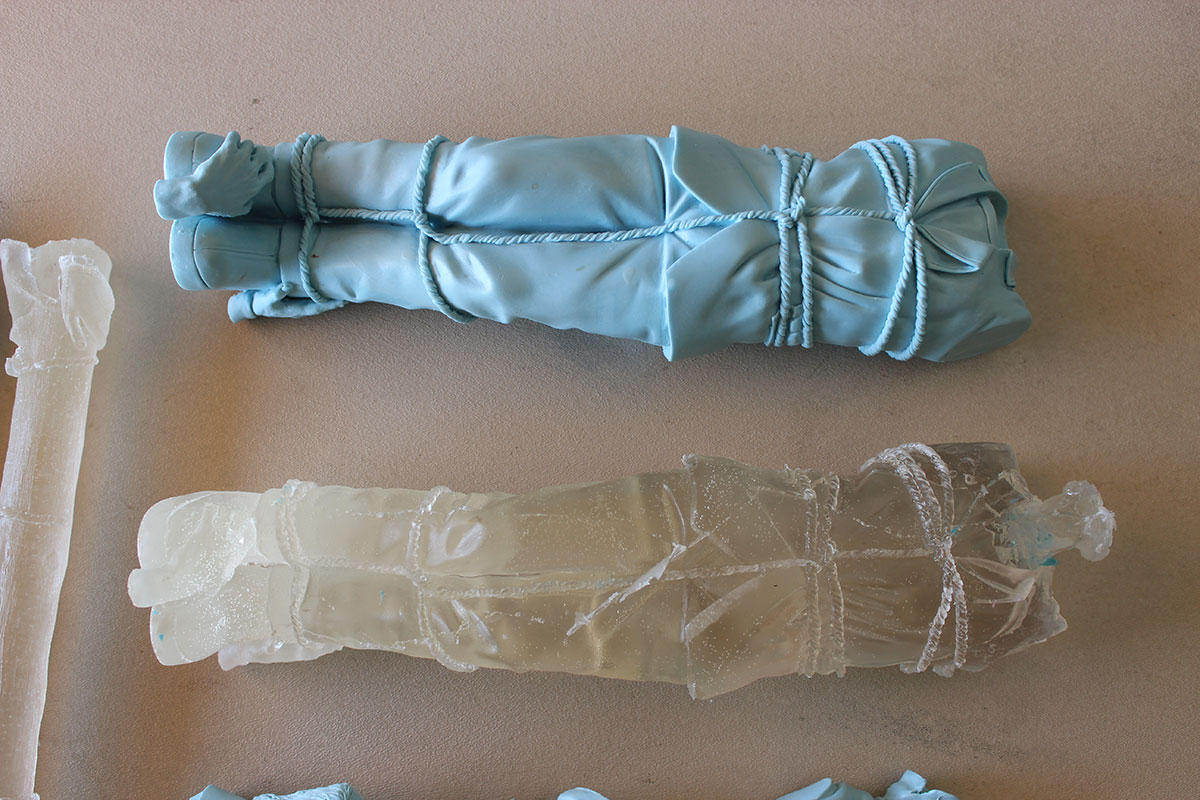
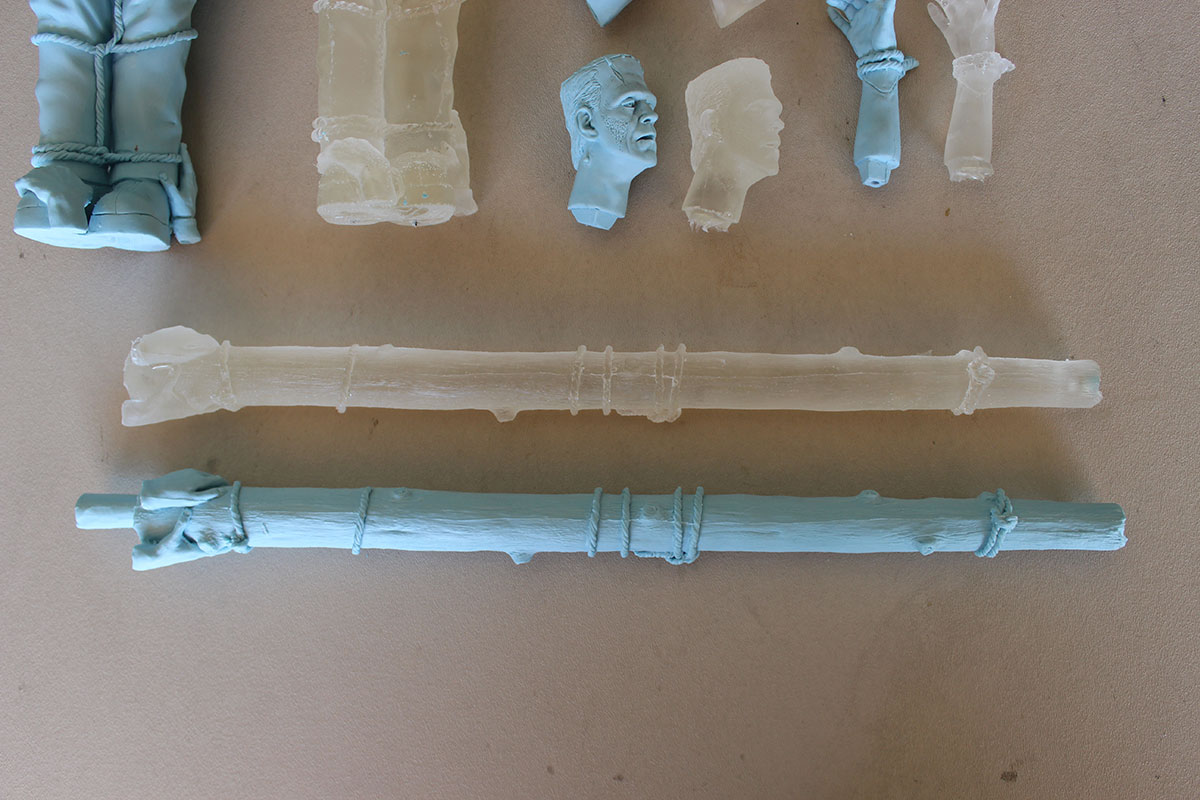
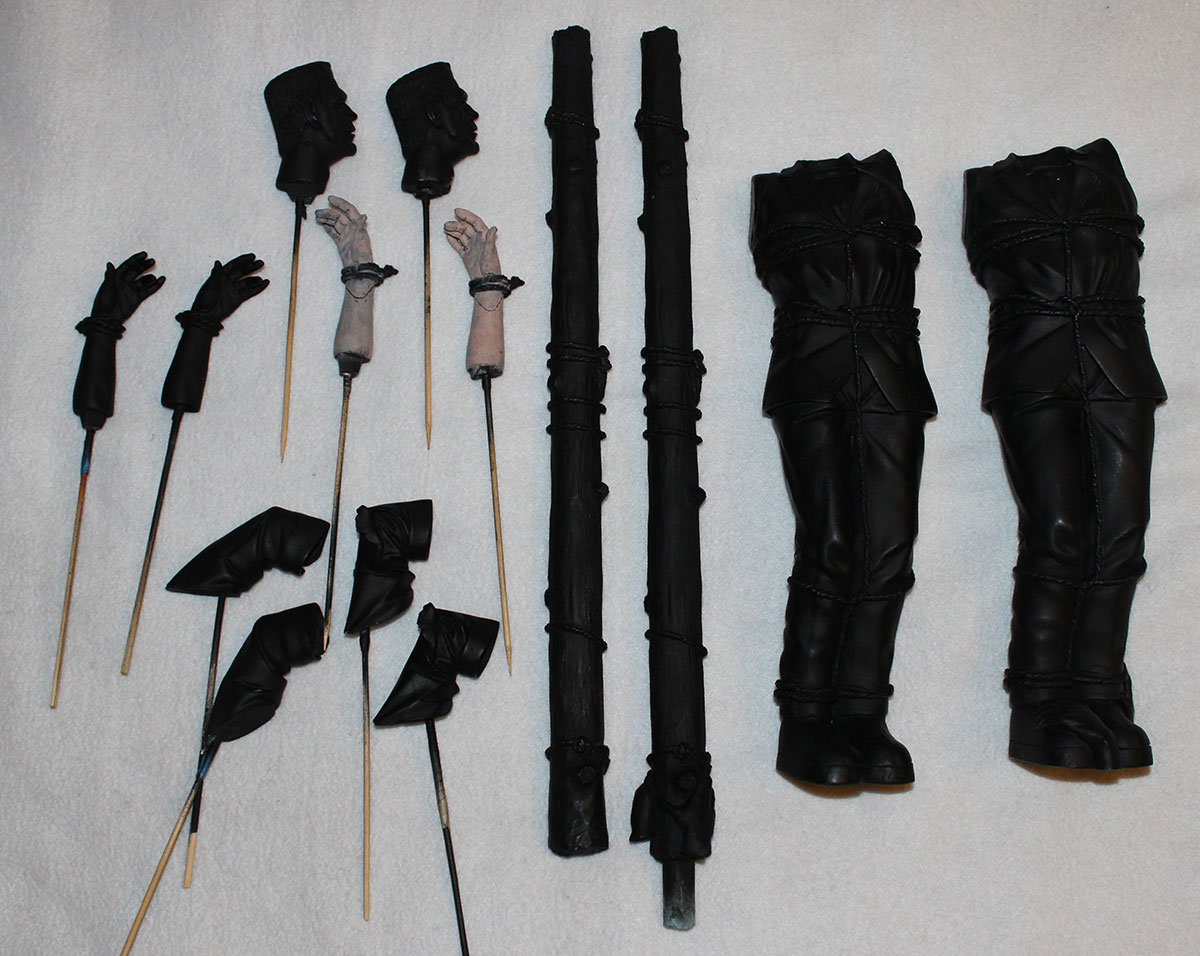
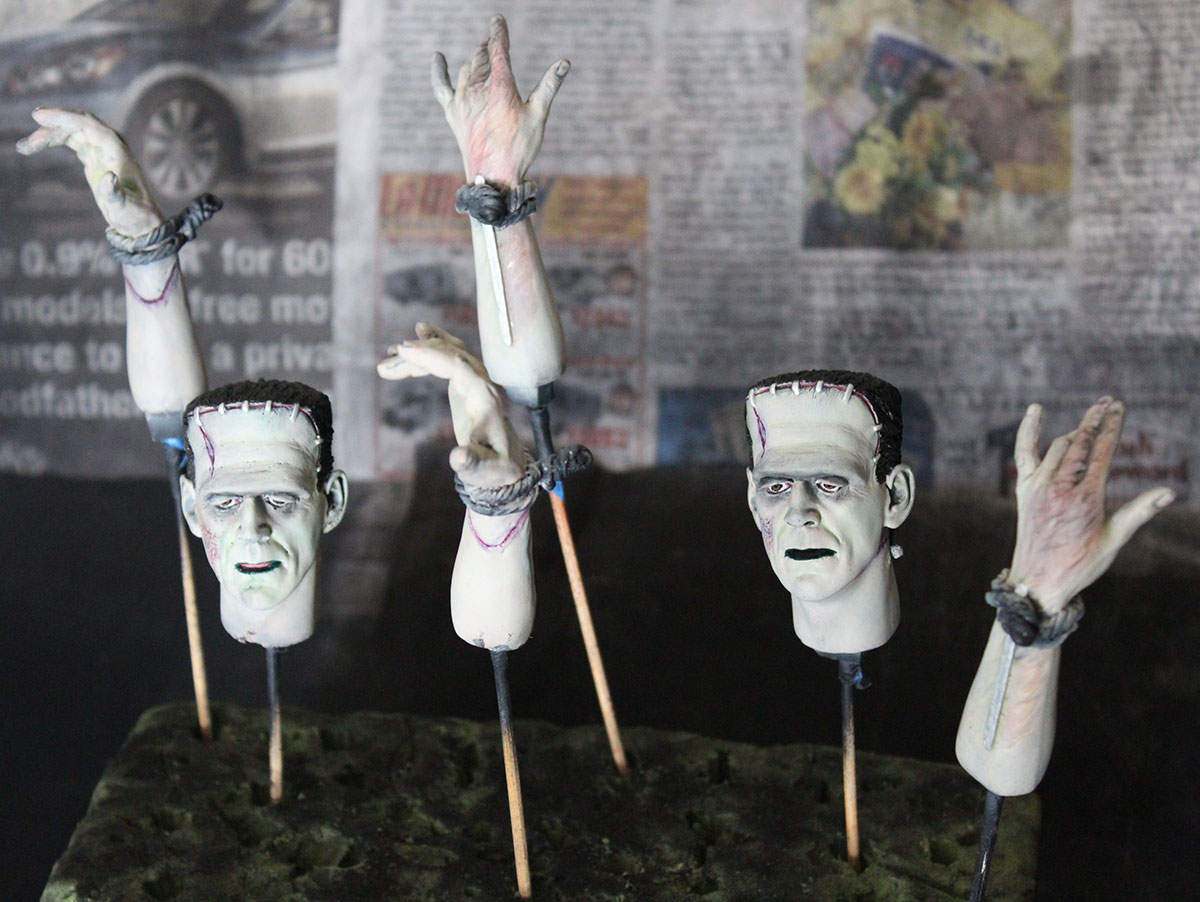
First photos are of the RTV material, obtained from Smooth On (Oomoo 25; photo 1), the molds that were made (photo 5), and the resin copies manufactured (photos 6-9). Of note was the use of a plastic vitamin bottle to serve as the just right sized container to make molds of the head and the two arms/hands parts. For the other molds I used foam core boards cut to the appropriate size. The small rectangular molds were for the upper arms. The long narrow rectangular mold is for the tree log and the large mold is for the monster’s body. All in all, 7 different molds were made.
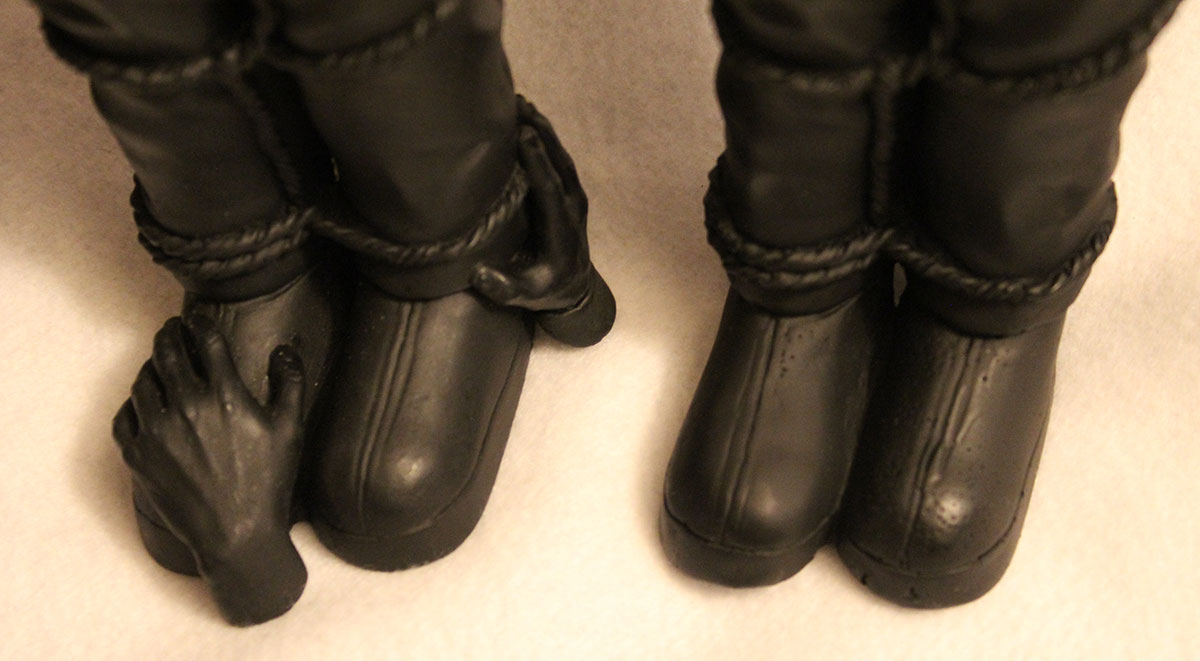
Clear resin was used (it was the cheapest) to make the copies. After curing and successfully removed from their molds, each piece of the monster was individually rendered for gluing and pinning in place. Each piece was given a black basecoat (photo 10). For the original crucifixion kit the base of the tree log and the boots of the monster had hands molded into each piece (see photo 6) and these were not necessary for the hay wagon scene so they were ground off and sanded smooth since they would be out of place in the hay wagon scene. A comparison of both feet of each body can readily see the difference (photos 11-13). The monster’s boots had heels so these needed to be carved in since they would be visible in the hay wagon diorama but not the crucifixion diorama. Also, the tree log needed to be lengthened about 4cm so I used Aves apoxie sculpt and sculpted in the extra length of the tree.
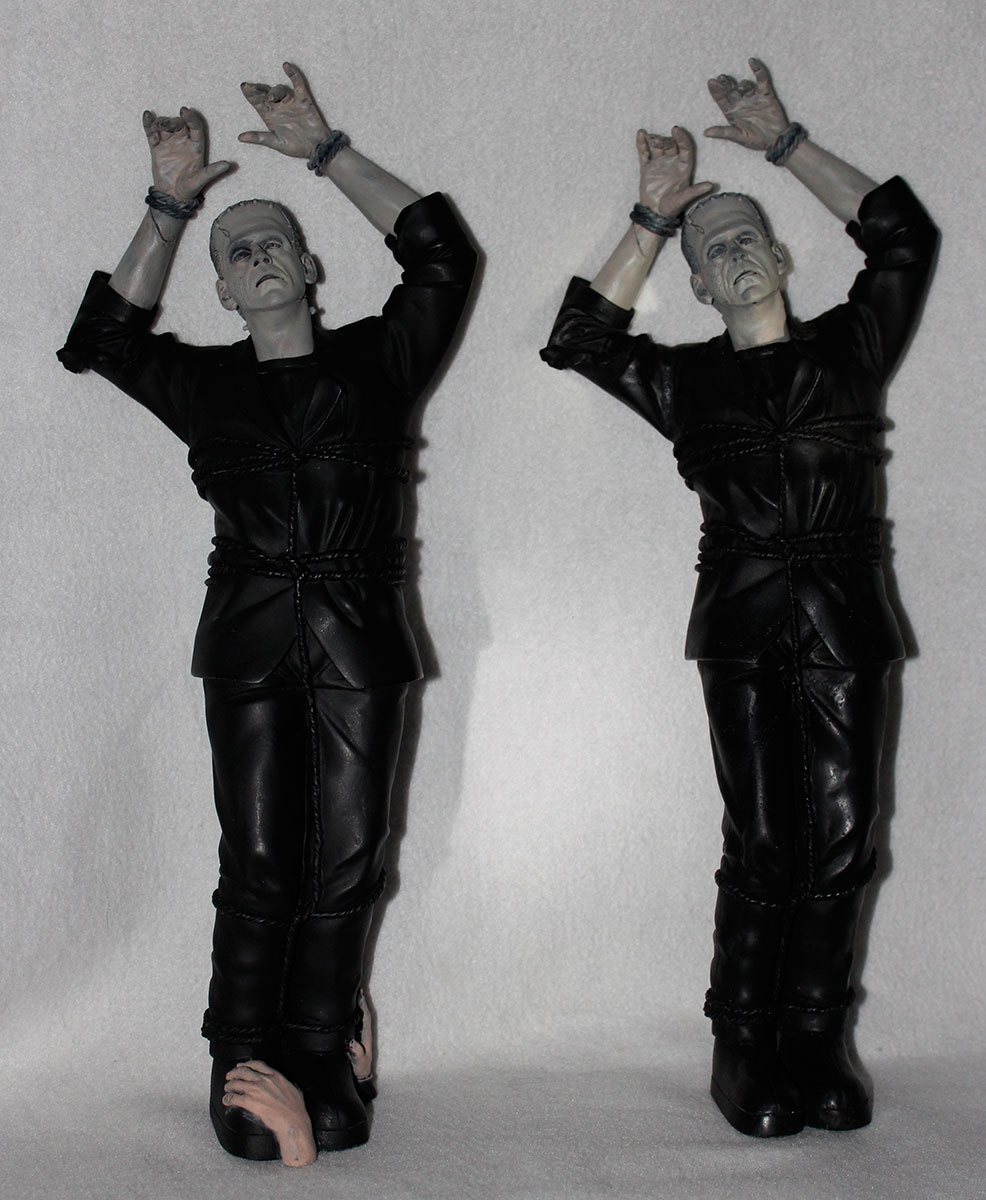
Jack Pierce added makeup over Karloff’s natural skin tone and that is how I painted the flesh of the monster (see photos 10, 26, 27). I first painted the pieces a natural flesh color and then airbrushed over that the “Frankenflesh” color (neutral gray mixed with chromium oxide green) in patches to leave a little of the under flesh color visible. Most likely the same way Jack Pierce added his makeup.
2) The Hay Wagon
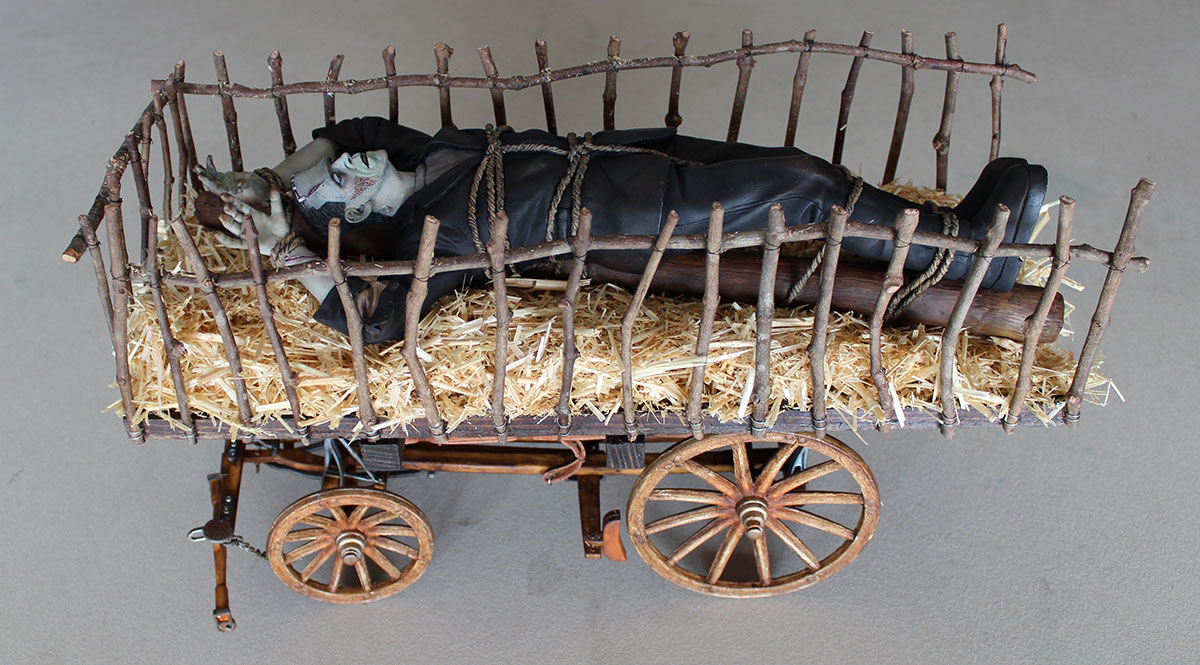
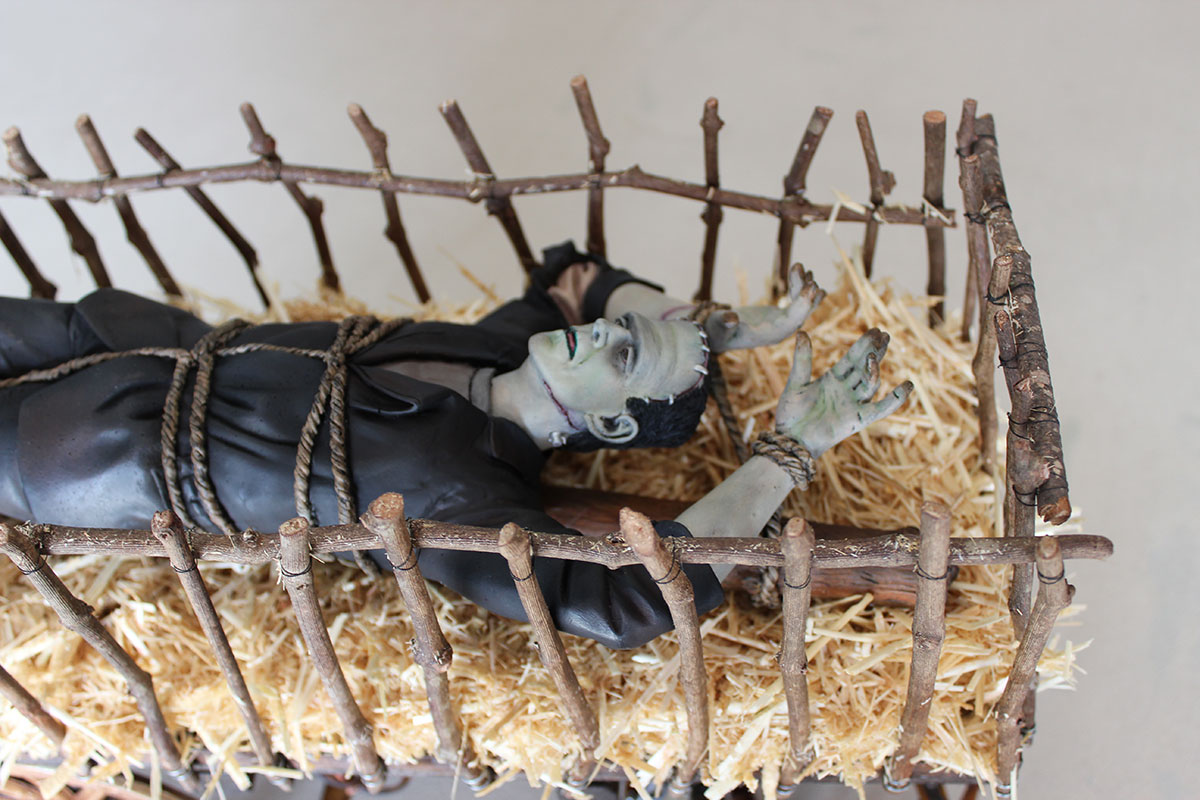
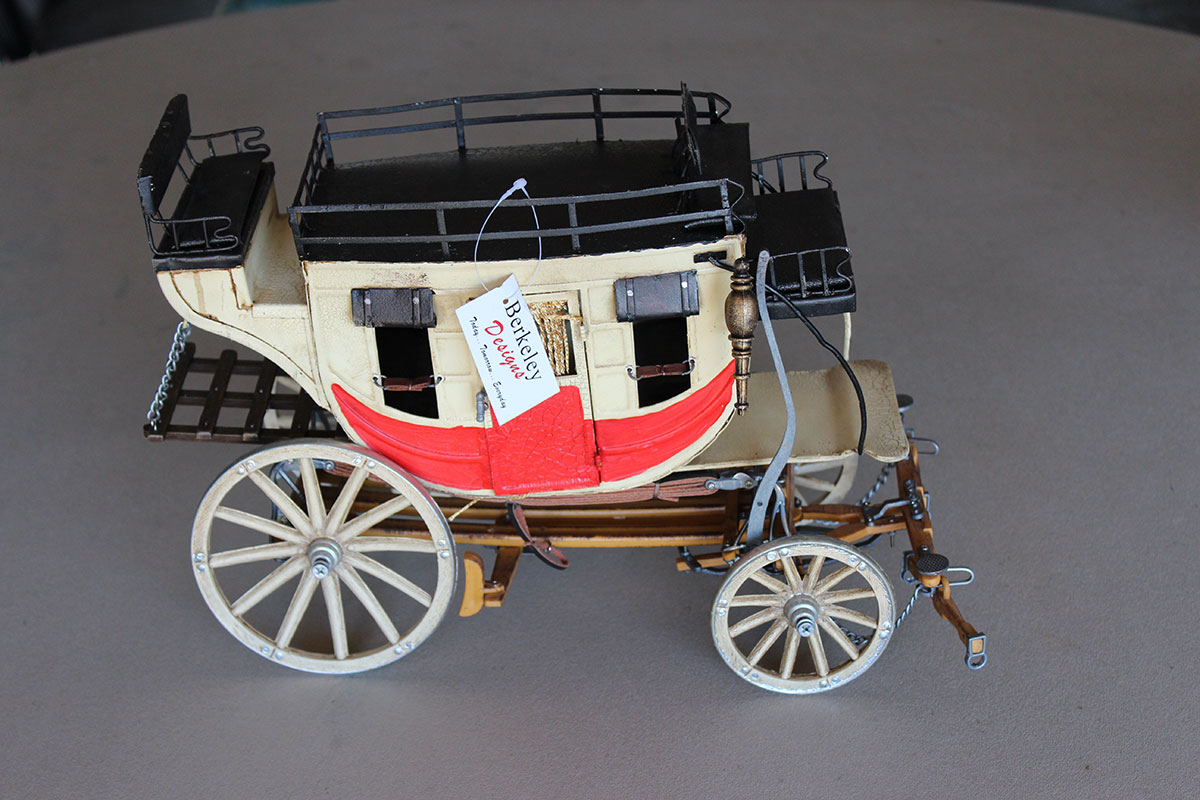
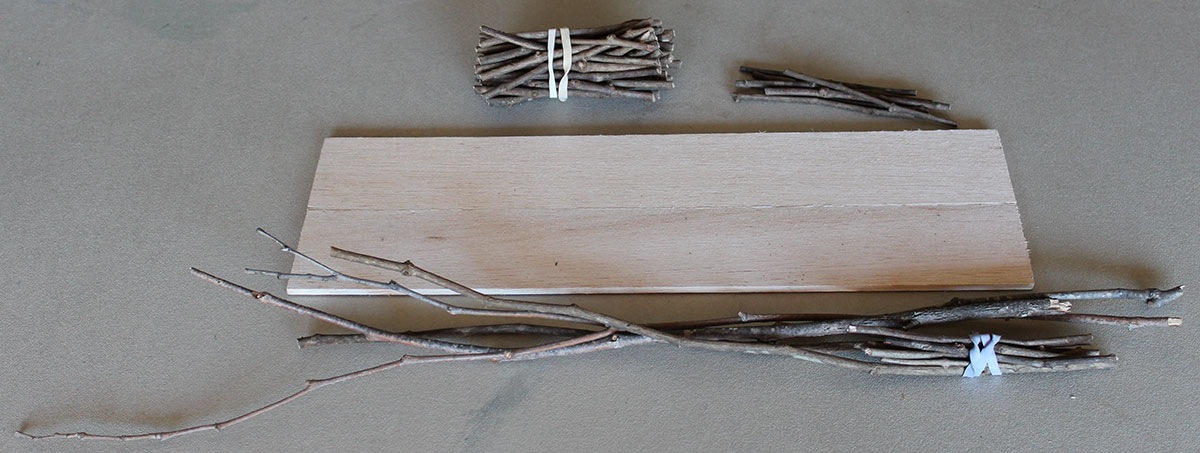
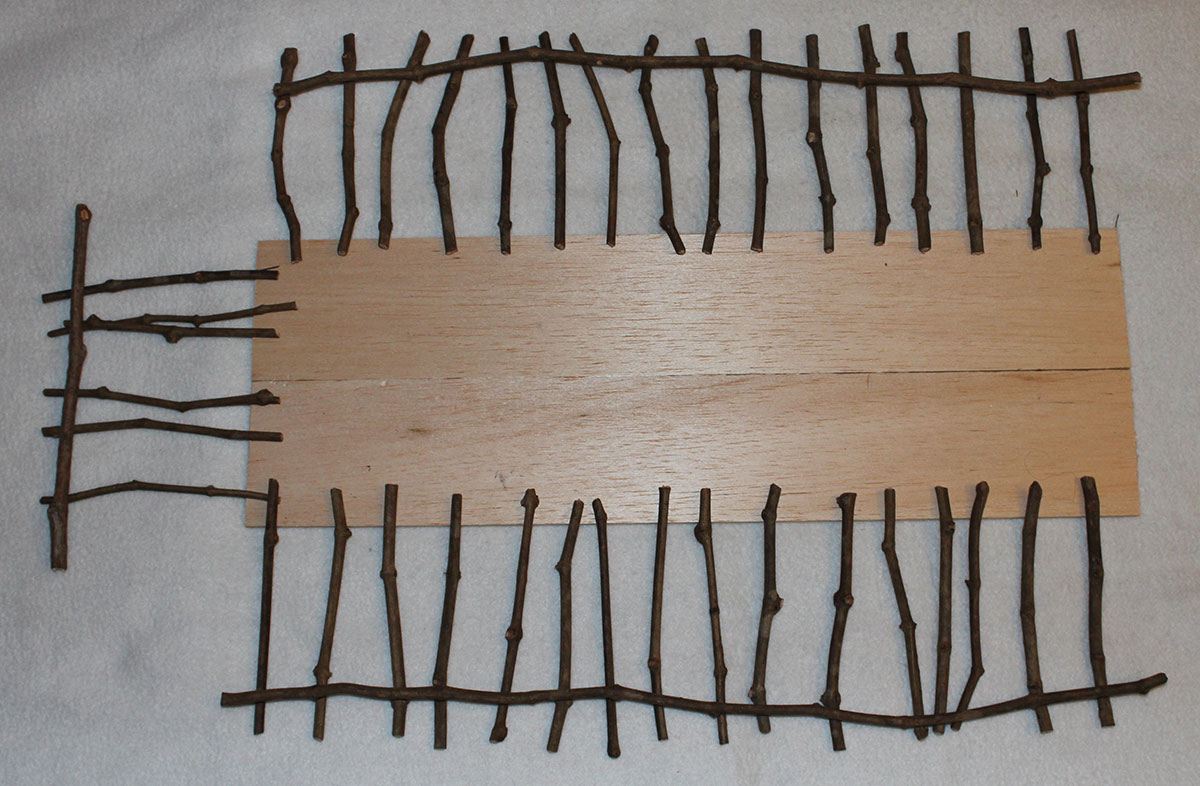
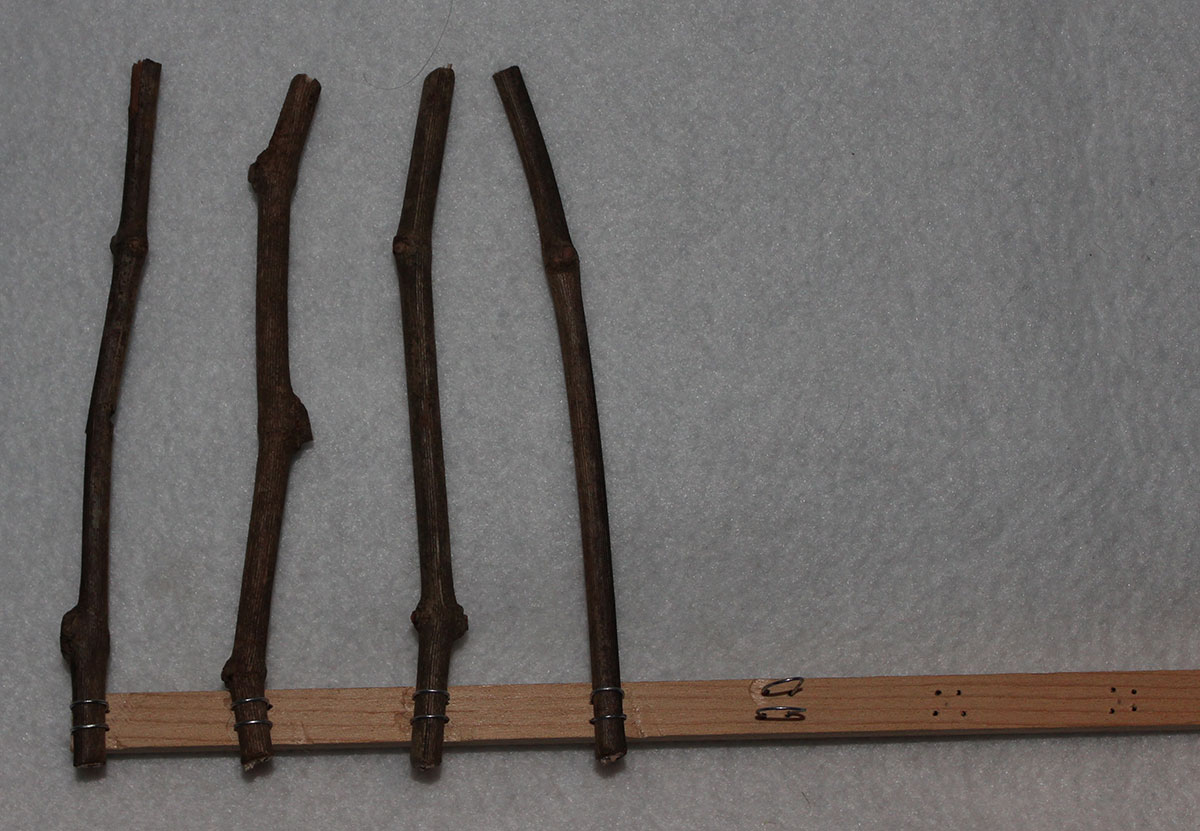
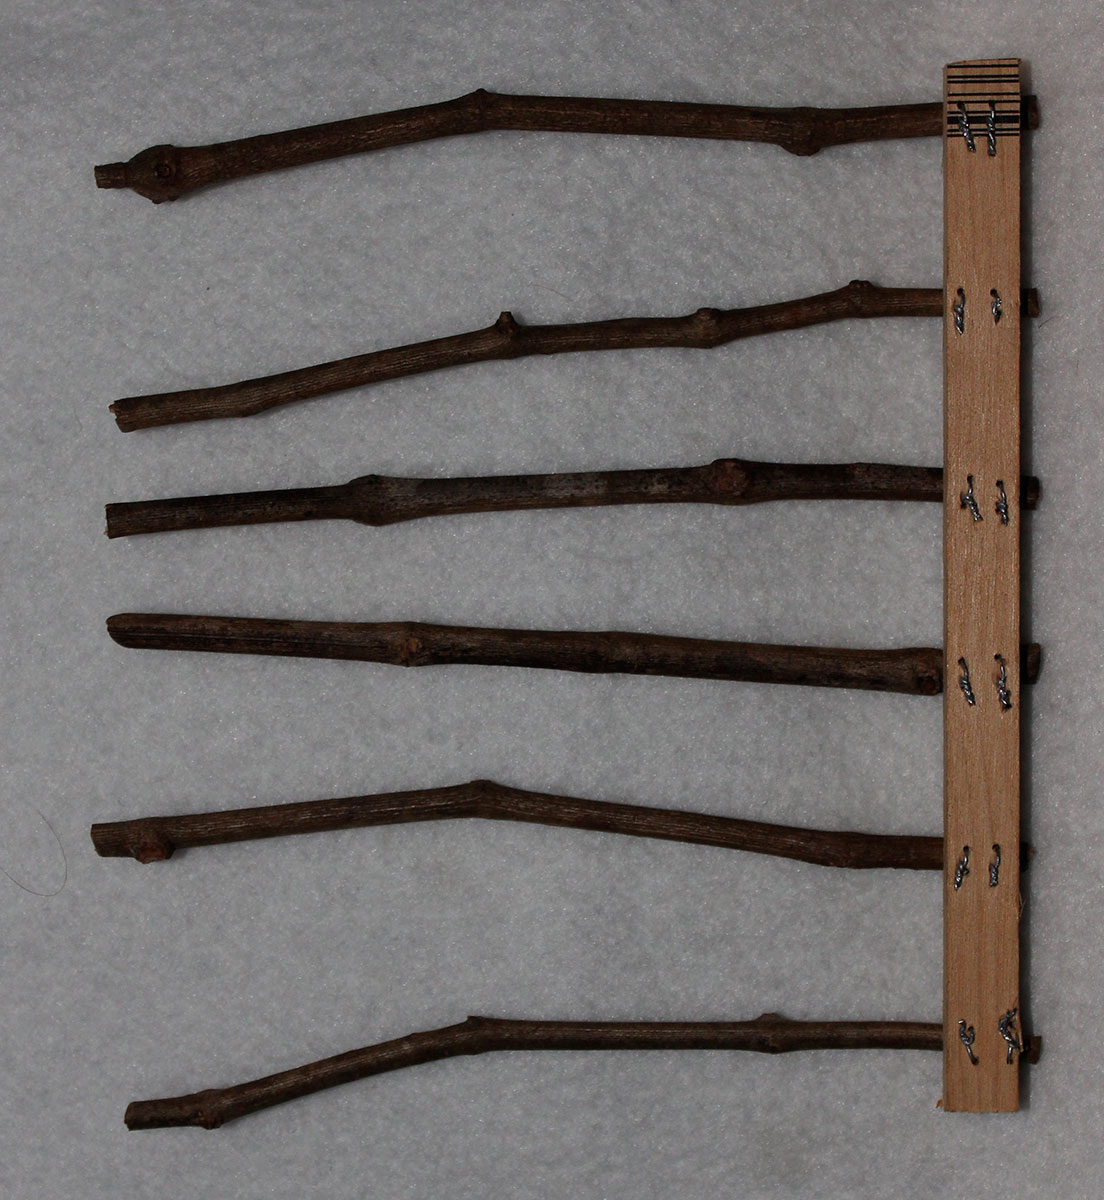
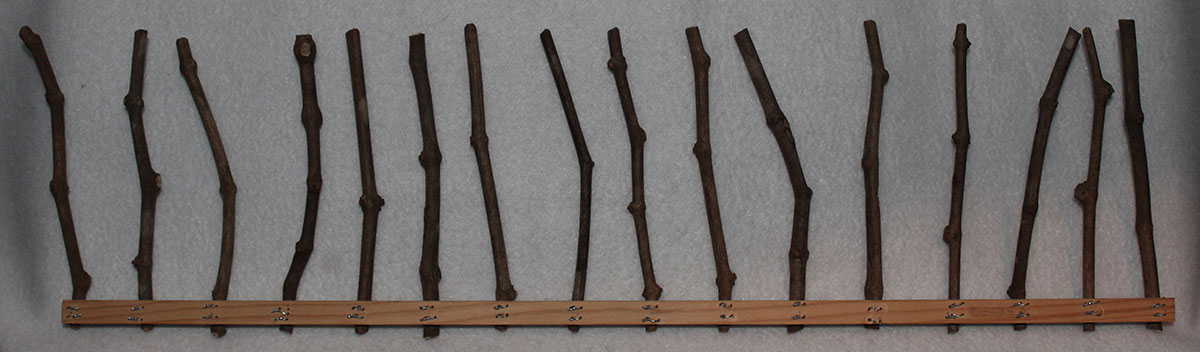
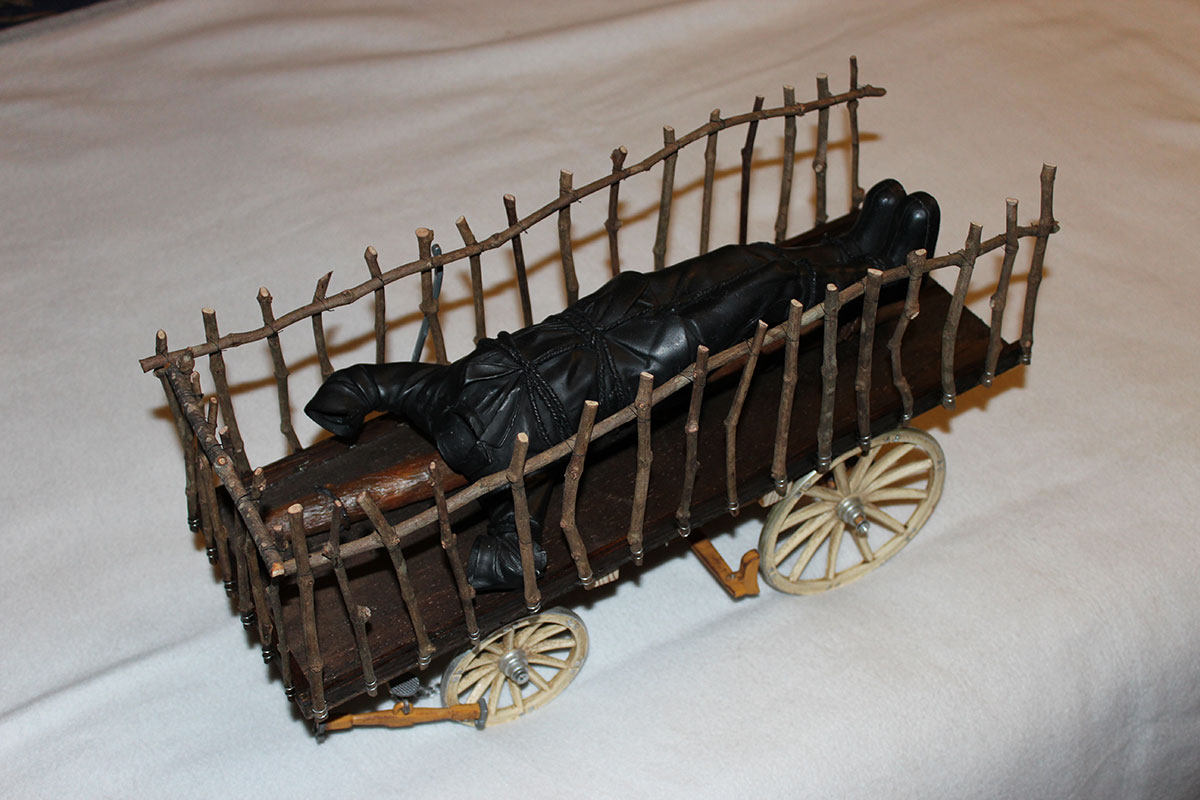
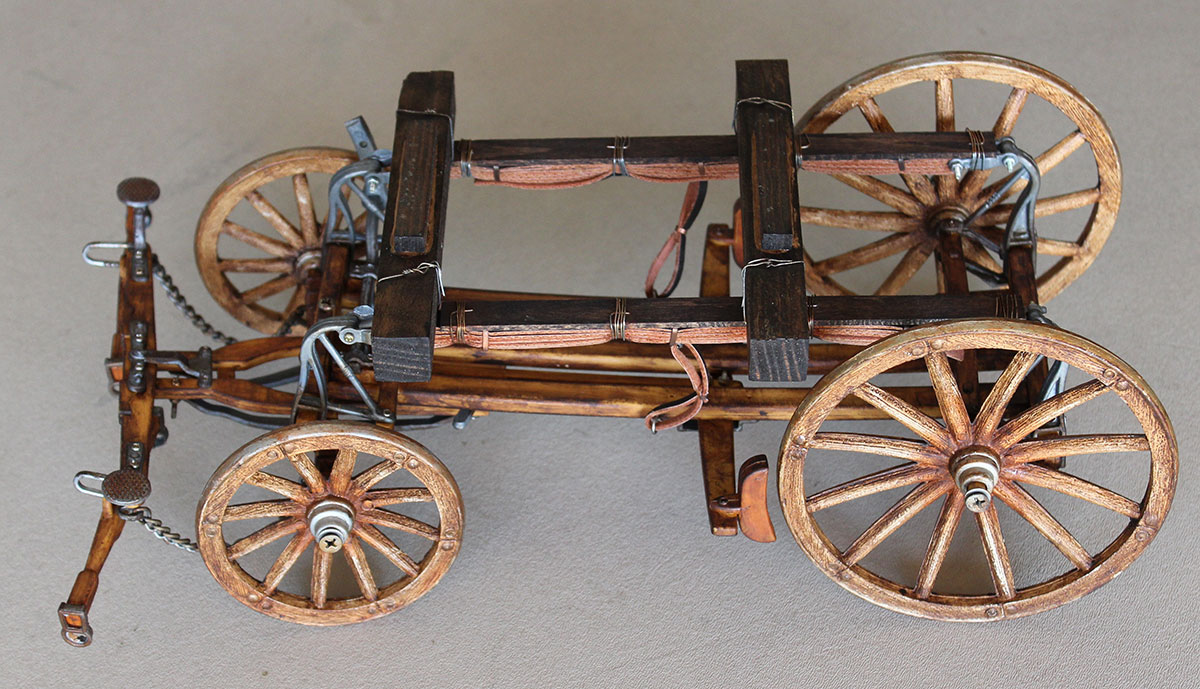
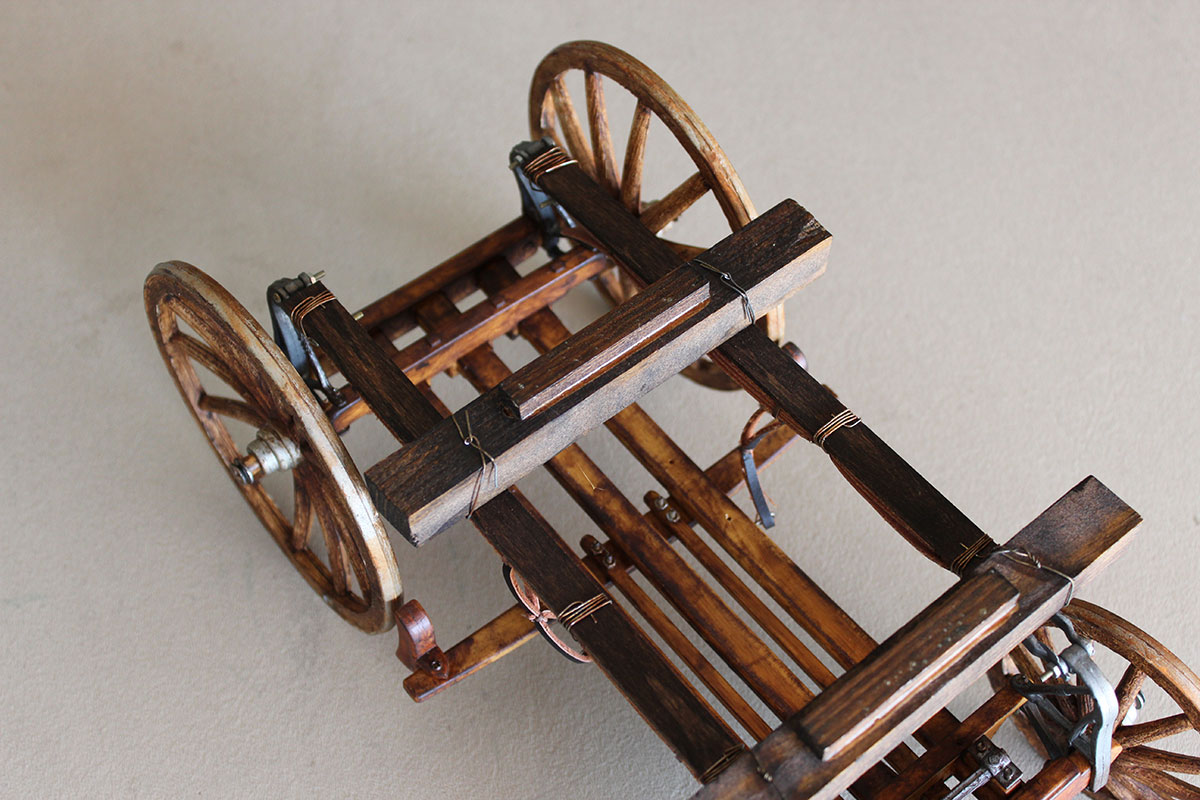
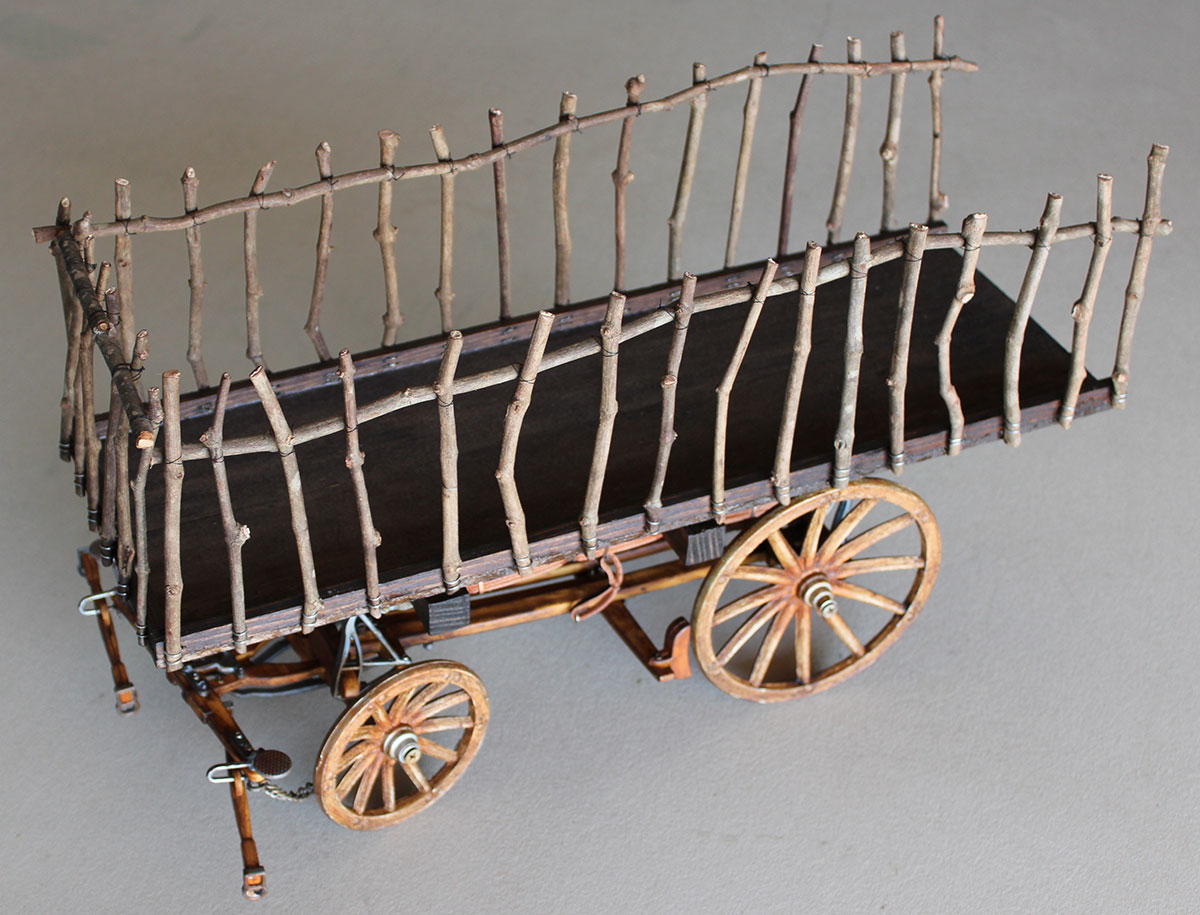
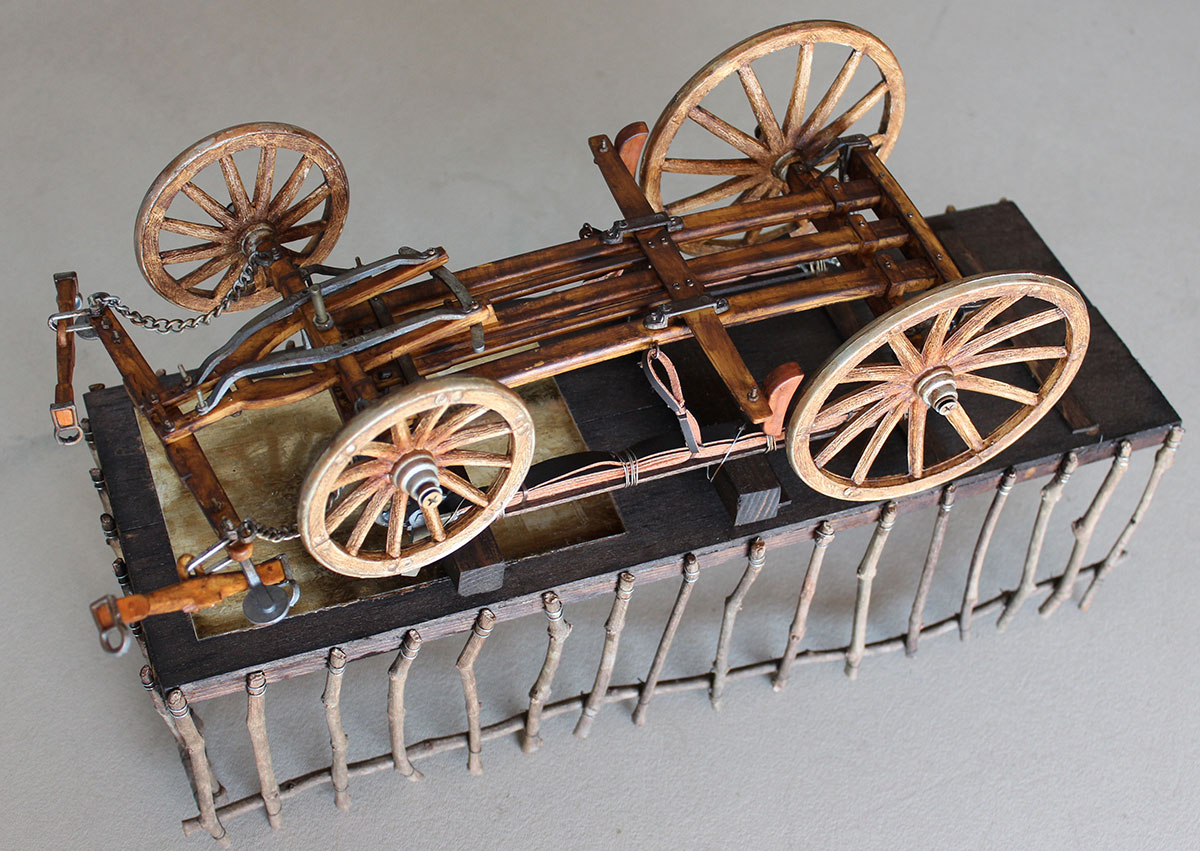
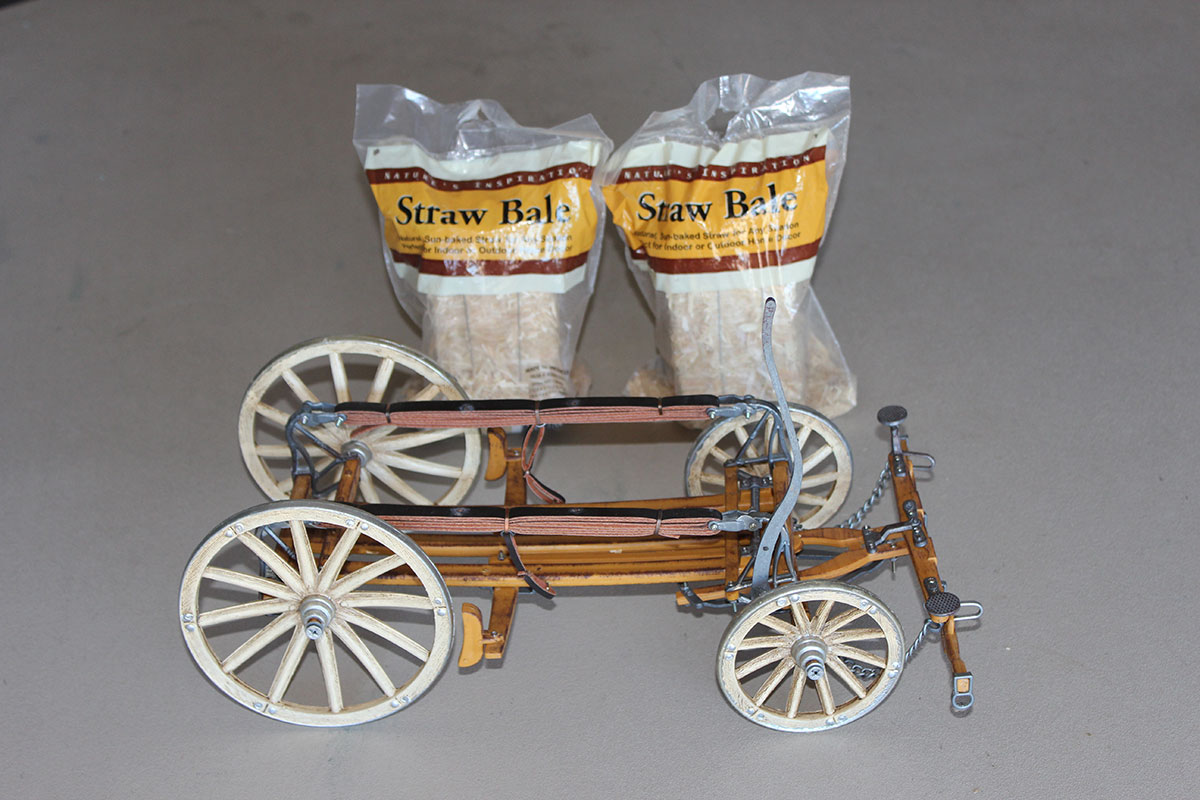
The hay wagon itself presented a different problem. Searching for hay wagons either located some that were way too small or too toy like. I did not want to scratch build a wheel carriage and after some thinking I thought I could convert a smallish stagecoach (around 1/6th scale, the same as the monster) to a hay wagon so I began to look for appropriate stagecoaches. After much looking (just about all, like hay wagons, were either too small or way too large) I came across what appeared to be a close enough size stagecoach that I gambled and ordered it from the catalog (photos 2-3). After it arrived and was inspected I thought that it would work. The coach part was removed and the wheel carriage bottom was painted and stained (the original looked too toy like and needed to be repainted; see photos 3 and 21 for comparison). The bed of the hay wagon was scratch built and made from two strips of balsa wood and stained (photo 4). By examining the hay wagon scene in the film the posts and rails of the hay wagon were sticks and there were 16 sticks to each side of the wagon and 6 sticks on the front (photos 14-15). To hold the stick rails together a long wood pole was attached to the top of the sticks. All the sticks used for this diorama were obtained from a tree and cut to size. To hold each stick rail to the side of the wagon bed small holes were drilled where 22 gauge wires were looped around securing each stick rail in place (photos 16-18). Then the two long top “poles” (just a longer stick) and the shorter front pole were secured to each rail. The completed rails were then glued to the balsa wood bed (photo 19). The bed needed to be raised above the carriage suspension so two small pieces of wood were attached to the carriage itself and the wagon bed simply glued on top of them (photos 21-24). The wheels easily rotate and the wheel brake actually works.
3) Hay
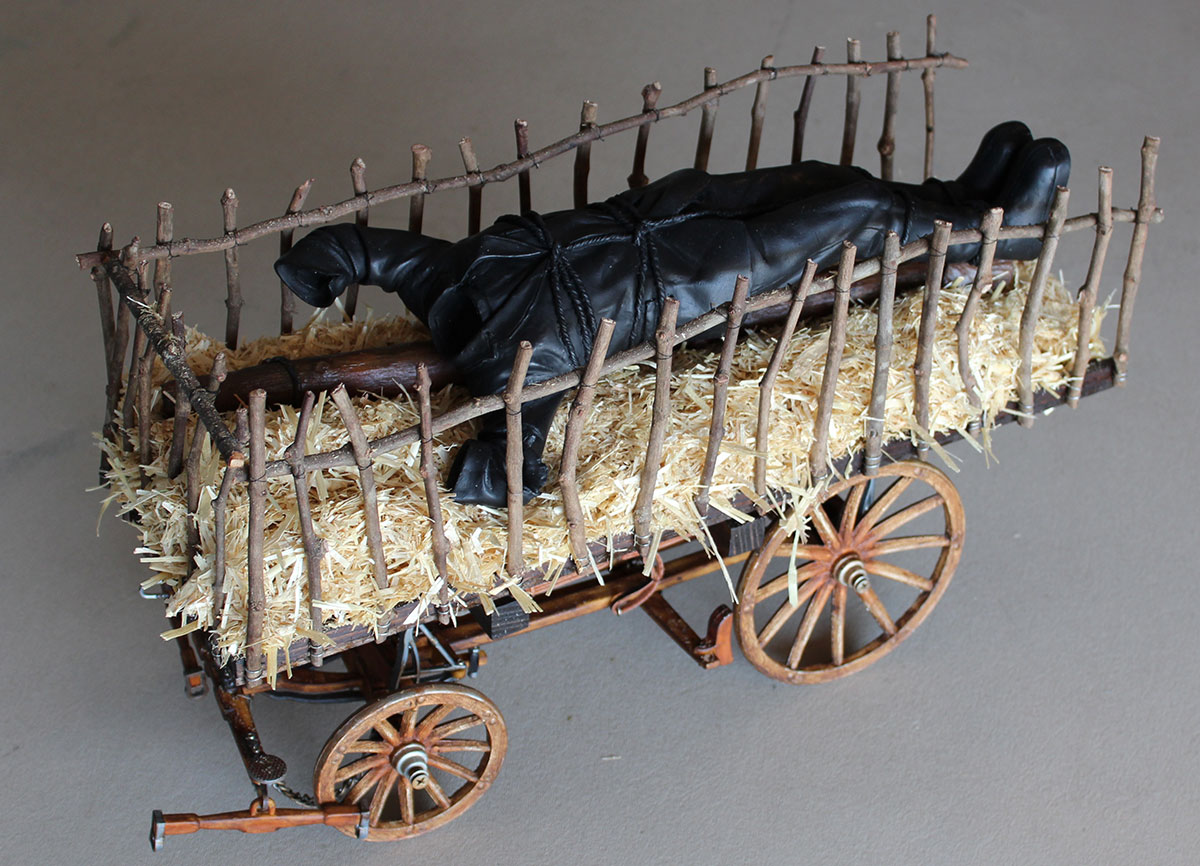
For “to scale” hay a trip to a local Michael’s craft store yielded small bales of hay (photo 3) that were more or less in the same scale necessary for the diorama. The hay was laid out on the bed of the wagon and sprayed with diluted white glue to keep the hay strands in place. Lastly, the completed duplicate monster tied to the log was simply just placed on top (see photos 15, 20, 25 for in-process shots). And there you have it, the completed diorama of the Bride of Frankenstein hay wagon ride (photos 28-30). And now I can place the completed crucifixion diorama next to the hay wagon diorama and have both as a small mini vignette of two key scenes from The Bride of Frankenstein. Yes, you can have your cake and eat it too!

